In the previous session, we learned how we can create an app in android studio mobile apps creator . Today i would like to show you how you can generate a signed apk for your applications which you will deploy in google play store and also share with your friends.
- Building a signed apk for your application.
We will generate a signed apk of the application we had developed in the last session.Open your android studio IDE and move to the left side and look for build variants option as shown here below.On the build variants drop-down select release option because release file is more optimized and doesn't contain any debugging symbols.The debug apk file is only suitable when we want to use the app for future app development with other mobile app developers. The screenshot is here below i have provided for you.
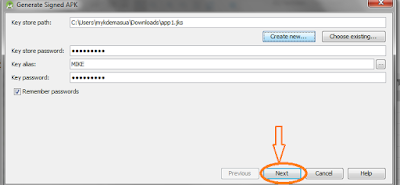
After selecting your favorite build variant, go to menu bar and click on build option. Here, a drop-down with several options will appear .From there select the Generate signed apk option and a new window like one below will open up.
2.Generating a key store file
Now to generate your own key store file, click on new option button and another new window will show up as shown below here.
This window popup will guide you in setting up the name of your key store file and the directory where you will store your file.To do this click on the button on the key store path as shown here below.
Once you are done setting the directory and name of your key store file, click the OK button and another window like this one below will open up.
Fill all the required details and click OK and a new window will open up requiring you to verify the data you have provided if its OK as shown here below.
The verification stage will lead you into the final stage of signing your apk where another new window popup will show up requiring us to confirm the directory where our app will be stored and also confirm the type of build variant we need as shown here below in this picture.
Verify the information you have provided if its okay and click finish button and within few seconds, you will receive a message popup showing you your apk has been successfully signed and generated as shown below.
Now go to your directory you set to store your app and share it with friends or upload it in play store.If you have any problems in signing your apk, dont hesitate to get back to me and i will be of great help to you.
Enjoy and stay tuned for greater posts.


Post a Comment Blogger Facebook